How to draw a Jack-O-Lantern
How to draw a Jack-O-Lantern. Halloween is likely the most horrible moment of the year! Around this party, spooky decorations are set up, and deception costumes are prepared. One of the most recognizable symbols of Halloween is the Jack-o-lantern, and these spooky pumpkins will be seen throughout this time of year. It can be fun to get into the Halloween spirit by learning how to draw a pumpkin!
You will be able to do this at the end of this tutorial. This step-by-step guide on how to draw a pumpkin will show you that drawing a pumpkin doesn’t have to be a scary experience. You can draw many more characters like bow and arrow drawing, Anubis drawing, betta fish drawing, cobra drawing, blueberry drawing, coconut drawing and many more cool drawings.
Draw of Jack-O-Lantern
Step 1:
In this first step of our guide to drawing a pumpkin, we will focus on the outline of the pumpkin. This outline will mainly consist of two rounded lines that mirror each other on the left and right. As you can see in the reference image, more lines will be above the one on the right, forming the leaf. Furthermore, there will be a big gap at the lid and base of the pumpkin shape.
Step 2:
This second step of your Jack-o-lantern drawing will be to create the base of the pumpkin. As you can see in the reference image, we’ll be using curved lines that connect to the base. Some lines will extend inside the pumpkin to form the pumpkin segments. For now, we’ll leave some space at the top of the pumpkin, as we’ll add some details later.
Step 3:
Now that you’ve finished most of the outline of your Jack-o-lantern drawing, you can finish the top part in the next step. The top will also have crisp lines extending down the length of the pumpkin, just like the previous lines extending from the base. You can also add a leaf to the top of the pumpkin at this part. That’s all there is to this part; you’re now ready for step three!
Step 4:
This step of our guide on how to draw a jack-o’-lantern should be easy enough for you! All you have to do for this one is draw the stem. This rod is quite thick and bends at a right angle. You can draw a circle at the end to show where it was cut. This process will even have a wheel body inside. You can finish upper with some thick line details inside for extra detail.
Step 5:
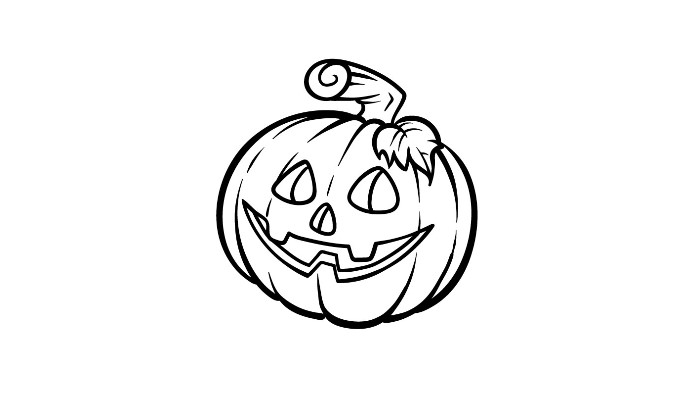
Without a scary face, it would be an ordinary pumpkin! We don’t want that for this drawing, so we’ll add a face in this step of our guide on how to draw a pumpkin. To draw the face, we’ll start with the eyes for now. These will consist of rounded triangles. They will also have lines drawn vertically downwards to give them depth. A matching triangle can then be utilized for the nose, but it will be vastly less. Finally, we’ll give the jack-o’-lantern its lustful maw.
It will be drawn with a combination of curved and rounded lines and drawn in such a way that there are two square teeth at the top and one at the bottom. It will finish the details of this pumpkin, but you can also add some details to bring it to life. Maybe you could add some of her favorite Halloween decorations to the background or create a spooky frame for her to sit on. You can also change some details to create your unique Jack-o-lantern!
Step 6:
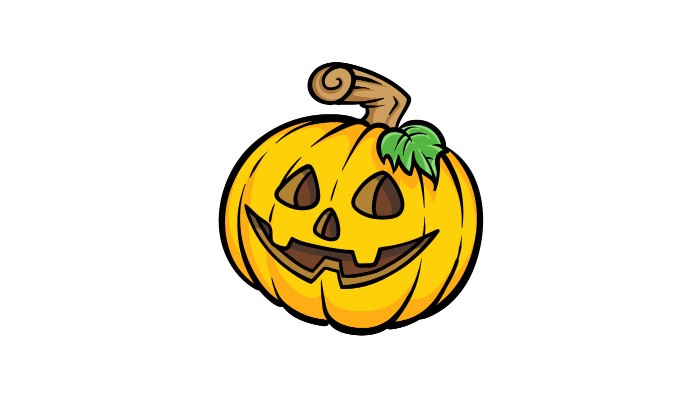
It brings you to the final step of your Jack-o-lantern drawing! It is the stage where you get many unique colors for your image. In our reference image, we used yellow and orange for the pumpkin. Then we use green for the leaf and brown for the stem. We chose these colors, but feel free to use any fantastic color you like!
You can change the shades of the colors or use less realistic ones for a more stylistic approach. If you draw additional background details, you can use those added elements for even more color variations. Once you know what colors you want, you must decide how to add them. Some more subdued mediums like watercolors and colored pencils would be great to help create a cooler, spookier look to the picture.
Make your Jack-o-lantern drawing even better!
Create spooky illustrations with these tips for your Jack-o-lantern sketch! The focus of this pumpkin drawing was all on the pumpkin, but I could add a few more details to make it even better. Maybe you could add more leaves to the pumpkin or draw dots and other details. These details would be small but subtle additions that would bring this Jack-o-lantern to life! What minor details can you think of adding? Then you can make this pumpkin even scarier by adding more Halloween decorations.
Jack-o’-lanterns are one of the many items you’ll see throughout the season, but there are many more! These could include bats, cobwebs, tombstones, witches, and monsters. It is your chance to create a spooky Halloween scene! Once you have added all the extra details and decorations, you can create a complete background environment for this Jack-o-lantern drawing. If you did that, you could choose all kinds of great places! It could be as simple as an alley, or you could draw a spooky graveyard. If you’re feeling creative, you might create an entire haunted house! What other ideas can you think of?
Another fun idea for this Jack-o-lantern would be to make a character out of him. You could make the pumpkin the head of a spooky ghost or monster. A less scary option would be to make it the face of a child in a Halloween costume. If you had to create a character, you could do it in any style so that the image suits you best! Finally, we encourage you to use colors to bring this Jack-o-lantern sketch to life. The colors you choose are only one part, but the artistic tools and mediums you use are another. By using bright yellow dots, you could even make it look like there’s a light inside the Jack-o-lantern!
Your Jack-o-lantern drawing is complete!
We hope following this guide on how to draw a Jack-o-lantern wasn’t a scary experience for you! By breaking a drawing down into smaller, more manageable steps, you can make it much easier and even more fun to master, and that’s what we’re trying to do for you in this guide. Now that you’ve finished this guide, the Halloween fun doesn’t have to stop here.
You can also add elements and details, including Halloween decorations, excellent background, or whatever you can think of. We hope to see you on our website when you’re ready for sounder fun. We have many excellent guides for you, and new ones are uploaded frequently. Once your Jack-o-lantern picture is done, we can’t stay to see it! You can transfer it with us on our Facebook and Pinterest carriers for us to respect.
Also Read: Virus Filtration