How to draw a toilet
How to draw a toilet. The toilet is a household item that we all know. It doesn’t matter if you are the queen in her palace or live in a small apartment. You probably still have one of these closures on hand! They can arrive in many additional deviations and styles and be very different in other countries and cultures.
Despite our familiarity with it, learning to draw a toilet can be surprisingly tricky! Luckily, this guide will help you in that quest. Our step-by-step directory on drawing a toilet will ensure you don’t waste unnecessary time struggling to complete this drawing. If you are looking for some cute drawings, drawing for kids, cartoons drawing, animals drawing and many more, then you are at the right place.
Drawing Toilet
Step 1:
In our guide on removing a bathroom, we’ll start with the toilet seat and lid. We’ll start with a thin, flat oval shape for the center. We will then circle it with another line for the outer edge of the seat. After that, we can draw the toilet lid. It will be drawn with a rounded line at the top of the seat. You can finish the cap by drawing another slightly curved line inside the outline of the hat for more detail. Once it looks like our reference image, you’re ready.
Step 2:
Next, we will draw your toilet tank in this step. The cistern is a reservoir usually located behind the bathroom and stores water that is then used for flushing it. First, we’ll draw the base of the cistern. It can be done with a slightly square, curved line extending to the back of the seat and then up. Next, we will draw a lid for the cistern. You can remove this cover by pulling another curved, square line at the top and extending it near the top of the hollow body. That’s all there is to the cistern in this part, so we can move on when you’re happy with how it works.
Step 3:
In the third step of this guide on drawing a toilet, we will add the handle with some additional details. For the grip, you can draw a little, flat, round shape inside an even smaller round shape. Then draw a line that touches this handle and goes down, forming the corner edge of the cistern. Once you’ve drawn the rim of the cistern, we’ll start with the toilet’s base. Instead, remove a curved line down from the future of the cistern. Then connect another curved line descending from this one and finish this part with another curved line on the outline for a curve at the base.
Step 4:
You are now prepared to meet the definitive outline of the bathroom drawing in this step. It will prepare you for some last pieces in the next step! To start, draw a curved line from the left edge of the seat. Then there will be another line coming out of this line and connecting to the other side of the base you drew in the last step. Once it’s drawn, we’ll add those final details in the next step!
Step 5:

This step in our guide on drawing a toilet will be to finish the final details to prepare you for the last part. To do this, we’ll add a few lines throughout the toilet’s body, seat, lid, and tank. It helps give the bathroom a bit more shape and structure. When you’ve drawn those final details, you’ll be ready for the next part!
However, you can also add some details before doing so. Some accessories, like a plunger or toilet bowl cleaner, could be nearby. Another idea would be to draw a little stool with a reader or a stack of magazines next to the toilet! These are just a few potential views, but have fun bringing creativity as you prepare for the final step.
Step 6:
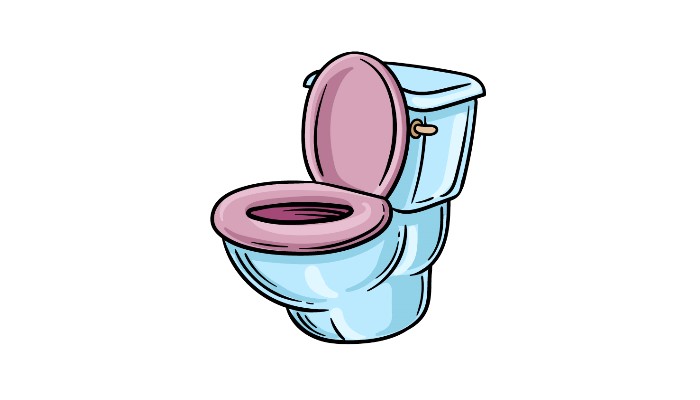
For the last part of your bathroom design, we will finish it with some colors. You might think that toilets are usually white porcelain, but the truth is that they come in all colors and styles. We utilized pink for the middle and lid in our reference image and light blue for the rest. These colors are our suggestions for a way to color this. You can use our suggestions, but this is also an opportunity to use your fantastic color options! Once you have chosen your colors, what supports and artistic tools to use?
4 more ways to make your bathroom drawing unique
Please find out how to make that bathroom sketch the best it can be with these four tips! For this toilet drawing, we focus entirely on the toilet itself. You can add objects usually found near a bathroom to make the image more unique. There are a few straightforward ideas I could add. These can include items like toilet paper or a plunger.
These are just a few things you could add, but you can probably think of a lot more you could add! Once you have added additional objects to this toilet design, you can create a background decor. If you had to, you could design any bathroom configuration you want. You can even model it after your bathroom to make it more personal and unique! What type of bathroom design would you like to add as a background for this drawing we created here?
Toilets arrive in many forms, sizes, and configurations. You can use this toilet sketch we drew as a base and modify some details to create your unique toilet design. If you enjoy trying this, you can look at the bathrooms in your home for inspiration. It would be easy to create a new look for this toilet by changing a few details. What type of bathroom design would you like to do here?
Another way toilet drawings differ is in the colors they come in. You can have fun with the colors you use for this toilet design! Again, you can use the restrooms around you for inspiration, but you should also feel free to create your design. Try out exciting art tools and media while you color; they can make the colors even more beautiful! What colors will you choose?
Your toilet drawing is complete!
That completes our lodestar on how to extract a restroom! As we mentioned in the yearbook, an object like a toilet can be deceptively challenging to remove. We hope that by following the steps in this guide, you will find a fun and easy experience without any frustration.
Don’t forget to further customize this design by adding some of your extra details, elements, and touches. Be certain to have fun bringing innovation with your color and medium choices! When you’ve closed the lid on this guide, we have plenty more on our website for you to enjoy! We have many more to come, so check back regularly.
Also Read: Hair straightening oil